大哉!敬虔的奥秘,无人不以为然,就是:神在肉身显现,被圣灵称义,被天使看见,被传于外邦,被世人信服,被接在荣耀里。(1 TIMOTHY 3:16)
MongoDB数据库(1)
MongoDB开始火了,这是时代发展的需要。为此,在这里也要探讨一下如何用Python来操作此数据库。考虑到读者对这种数据库的了解可能比关系型数据库陌生,所以,要用多一点的篇幅来介绍。
MongoDB是属于NoSql的。
NoSql(Not Only Sql)指的是非关系型的数据库。它是为了大规模Web应用而生的,其特征诸如模式自由、支持简易复制、简单的API、大容量数据等。
MongoDB是NoSql其一,选择它,主要是因为我喜欢,下面说说它的特点。
- 面向文档存储
- 对任何属性可索引
- 复制和高可用性
- 自动分片
- 丰富的查询
- 快速就地更新
基于它的特点,擅长的领域就在于:
- 大数据(太时髦了!以下可以都不看,有这么一条就足够了)
- 内容管理和交付
- 移动和社交基础设施
- 用户数据管理
- 数据平台
安装MongoDB
先演示在Ubuntu系统中的安装过程:
sudo apt-key adv --keyserver hkp://keyserver.ubuntu.com:80 --recv 7F0CEB10
echo 'deb http://downloads-distro.mongodb.org/repo/ubuntu-upstart dist 10gen' | sudo tee /etc/apt/sources.list.d/mongodb.list
sudo apt-get update
sudo apt-get install mongodb-10gen
如此就安装完毕。上述安装流程可以参考:Install MongoDB
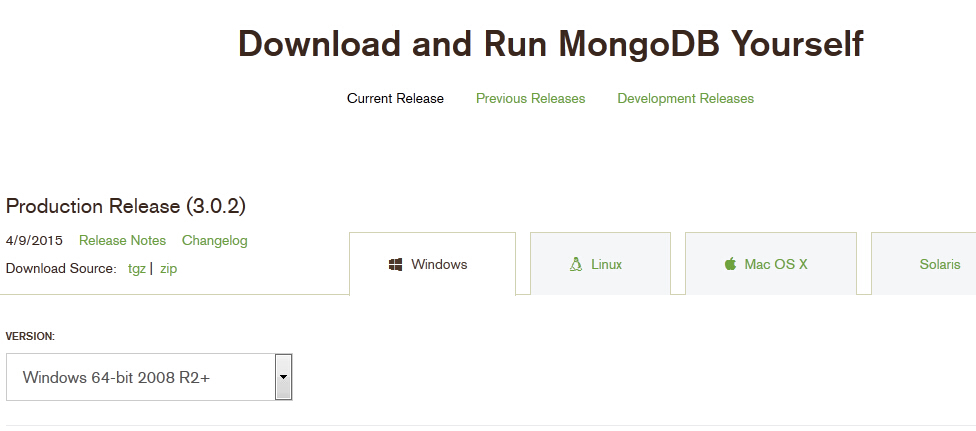
如果你用的是其它操作系统,可以到官方网站下载安装程序:http://www.mongodb.org/downloads,该网站能满足各种操作系统。
如果在安装过程中遇到了问题,建议去问Google大神(如果有读者心存疑虑或者愤愤不平,请不要发怒,这是我的个人建议,不同意可以略过,我当然也尊重读者的个人选择)。
推荐几个资料,供参考:
启动
安装完毕就可以启动数据库。因为本书不是专门讲数据库,所以这里不涉及数据库的详细讲解,下面只是建立一个简单的库,并且说明MongoDB的基本要点,目的在于为后面用Python来操作它做个铺垫。
执行mongo启动shell,显示的也是>,有点类似mysql的状态。在shell中,可以实现与数据库的交互操作。
在shell中,有一个全局变量db,使用哪个数据库,那个数据库作为对象被赋给这个全局变量db,如果那个数据库不存在,就会新建。
> use mydb
switched to db mydb
> db
mydb
除非向这个数据库中增加实质性的内容,否则它是看不到的。
> show dbs;
local    0.03125GB
向这个数据库增加点东西。MongoDB的基本单元是文档,所谓文档,就类似与Python中的字典,以“键/值对”的方式保存数据。
> book = {"title":"from beginner to master", "author":"qiwsir", "lang":"python"}
{
    "title" : "from beginner to master",
    "author" : "qiwsir",
    "lang" : "python"
}
> db.books.insert(book)
> db.books.find()
{ "_id" : ObjectId("554f0e3cf579bc0767db9edf"), "title" : "from beginner to master", "author" : "qiwsir", "lang" : "python" }
db指向了数据库mydb,books是这个数据库里面的一个集合(类似mysql里面的表),向集合books里面插入了一个文档(文档对应mysql里面的记录)。“数据库、集合、文档”构成了MongoDB数据库。
从上面操作还发现一个有意思的地方,并没有类似create之类的命令,用到数据库,就通过use xxx,如果不存在就建立;用到集合,就通过db.xxx来使用,如果没有就建立。可以总结为“随用随取随建立”。是不是简单的有点出人意料。
> show dbs
local    0.03125GB
mydb    0.0625GB
当有了充实内容之后,会看到刚才用到的数据库mydb了。
在shell中,可以对数据进行“增删改查”等操作。但是,我们的目的是用Python来操作,所以,还是把力气放在后面用。
安装pymongo
要用Python来驱动MongoDB,必须要安装驱动模块,即pymongo,这跟操作mysql类似。安装方法推荐如下:
$ sudo pip install pymongo
如果顺利,就会看到最后的提示:
Successfully installed pymongo
Cleaning up...
写本书的时候,安装版本号如下,如果读者的版本不一样,也无大碍。
>>> import pymongo
>>> pymongo.version
'3.0.1'
如果读者要指定版本,比如安装2.8版本的,可以:
$ sudo pip install pymongo==2.8
安装好之后,进入到Python的交互模式:
>>> import pymongo
说明模块没有问题。
连接
既然Python驱动MongoDB的模块pymongo业已安装完毕,接下来就是连接,即建立连接对象。
>>> pymongo.Connection("localhost",27017)
Traceback (most recent call last):
  File "<stdin>", line 1, in <module>
AttributeError: 'module' object has no attribute 'Connection'
报错!我在写本书之前做项目时,就是按照上面方法连接的,读者可以查一下,会发现很多教程是这么连接的。但是,眼睁睁地看到了报错。
所以,一定要注意这里的坑。
如果读者用的是旧版本的pymongo,比如2.8,仍然可以使用上面的连接方法。如果是像我一样,是用的新的(我安装时没有选版本),就得注意这个问题了。
经验主义害死人。必须看看下面有哪些方法可以用:
>>> dir(pymongo)
['ALL', 'ASCENDING', 'CursorType', 'DESCENDING', 'DeleteMany', 'DeleteOne', 'GEO2D', 'GEOHAYSTACK', 'GEOSPHERE', 'HASHED', 'IndexModel', 'InsertOne', 'MAX_SUPPORTED_WIRE_VERSION', 'MIN_SUPPORTED_WIRE_VERSION', 'MongoClient', 'MongoReplicaSetClient', 'OFF', 'ReadPreference', 'ReplaceOne', 'ReturnDocument', 'SLOW_ONLY', 'TEXT', 'UpdateMany', 'UpdateOne', 'WriteConcern', '__builtins__', '__doc__', '__file__', '__name__', '__package__', '__path__', '_cmessage', 'auth', 'bulk', 'client_options', 'collection', 'command_cursor', 'common', 'cursor', 'cursor_manager', 'database', 'errors', 'get_version_string', 'has_c', 'helpers', 'ismaster', 'message', 'mongo_client', 'mongo_replica_set_client', 'monitor', 'monotonic', 'network', 'operations', 'periodic_executor', 'pool', 'read_preferences', 'response', 'results', 'server', 'server_description', 'server_selectors', 'server_type', 'settings', 'son_manipulator', 'ssl_context', 'ssl_support', 'thread_util', 'topology', 'topology_description', 'uri_parser', 'version', 'version_tuple', 'write_concern']
瞪大我的那双浑浊迷茫、布满血丝、渴望惊喜的眼睛,透过近视镜的玻璃片,怎么也找不到Connection()这个方法。原来,刚刚安装的pymongo,“他变了”。
不过,我发现了MongoClient(),真乃峰回路转。
>>> client = pymongo.MongoClient("localhost", 27017)
很好。Python已经和MongoDB建立了连接。
刚才已经建立了一个数据库mydb,并且在这个库里面有一个集合books,于是:
>>> db = client.mydb
或者
>>> db = client['mydb']
获得数据库mydb,并赋值给变量db(这个变量不是MongoDB的shell中的那个db,此处的db就是Python中一个寻常的变量)。
>>> db.collection_names()
[u'system.indexes', u'books']
查看集合,发现了我们已经建立好的那个books,于是再获取这个集合,并赋值给一个变量books:
>>> books = db["books"]
或者
>>> books = db.books
接下来,就可以操作这个集合中的具体内容了。
编辑
刚刚的books所引用的是一个MongoDB的集合对象,它就跟前面学习过的其它对象一样,有一些方法供我们来驱使。
>>> type(books)
<class 'pymongo.collection.Collection'>

>>> dir(books)
['_BaseObject__codec_options', '_BaseObject__read_preference', '_BaseObject__write_concern', '_Collection__create', '_Collection__create_index', '_Collection__database', '_Collection__find_and_modify', '_Collection__full_name', '_Collection__name', '__call__', '__class__', '__delattr__', '__dict__', '__doc__', '__eq__', '__format__', '__getattr__', '__getattribute__', '__getitem__', '__hash__', '__init__', '__iter__', '__module__', '__ne__', '__new__', '__next__', '__reduce__', '__reduce_ex__', '__repr__', '__setattr__', '__sizeof__', '__str__', '__subclasshook__', '__weakref__', '_command', '_count', '_delete', '_insert', '_socket_for_primary_reads', '_socket_for_reads', '_socket_for_writes', '_update', 'aggregate', 'bulk_write', 'codec_options', 'count', 'create_index', 'create_indexes', 'database', 'delete_many', 'delete_one', 'distinct', 'drop', 'drop_index', 'drop_indexes', 'ensure_index', 'find', 'find_and_modify', 'find_one', 'find_one_and_delete', 'find_one_and_replace', 'find_one_and_update', 'full_name', 'group', 'index_information', 'initialize_ordered_bulk_op', 'initialize_unordered_bulk_op', 'inline_map_reduce', 'insert', 'insert_many', 'insert_one', 'list_indexes', 'map_reduce', 'name', 'next', 'options', 'parallel_scan', 'read_preference', 'reindex', 'remove', 'rename', 'replace_one', 'save', 'update', 'update_many', 'update_one', 'with_options', 'write_concern']
这么多方法不会一一介绍,只是按照“增删改查”的常用功能介绍几种。读者可以使用help()去查看每一种方法的使用说明。
>>> books.find_one()
{u'lang': u'python', u'_id': ObjectId('554f0e3cf579bc0767db9edf'), u'author': u'qiwsir', u'title': u'from beginner to master'}
提醒读者注意的是,MongoDB的shell中的命令与pymongo中的方法有时候会稍有差别,务必小心。比如刚才这个,在shell中是这样子的:
> db.books.findOne()
{
    "_id" : ObjectId("554f0e3cf579bc0767db9edf"),
    "title" : "from beginner to master",
    "author" : "qiwsir",
    "lang" : "python"
}
请注意区分。
目前在集合books中,有一个文档,还想再增加,于是就进入到了“增删改查”的常规操作。
新增和查询
>>> b2 = {"title":"physics", "author":"Newton", "lang":"english"}
>>> books.insert(b2)
ObjectId('554f28f465db941152e6df8b')
成功地向集合中增加了一个文档。得看看结果(我们就是充满好奇心的小孩子,我记得女儿小时候,每次给她照相,每拍了一张,她总要看一看。现在我们似乎也是这样,如果不看看,总觉得不放心),看看就是一种查询。
>>> books.find().count()
2
这是查看当前集合有多少个文档的方式,返回值为2,则说明有两条文档了。还是要看看内容。
>>> books.find_one()
{u'lang': u'python', u'_id': ObjectId('554f0e3cf579bc0767db9edf'), u'author': u'qiwsir', u'title': u'from beginner to master'}
这个命令就不行了,因为它只返回第一条。必须要:
>>> for i in books.find():
...     print i        #Python 3: print(i)
...
{u'lang': u'python', u'_id': ObjectId('554f0e3cf579bc0767db9edf'), u'author': u'qiwsir', u'title': u'from beginner to master'}
{u'lang': u'english', u'title': u'physics', u'_id': ObjectId('554f28f465db941152e6df8b'), u'author': u'Newton'}
在books引用的对象中有find()方法,它返回的是一个可迭代对象,包含着集合中所有的文档。
由于文档是“键/值”对,不一定每条文档都要结构一样,比如,也可以在集合中插入这样的文档。
>>> books.insert({"name":"Hertz"})
ObjectId('554f2b4565db941152e6df8c')
>>> for i in books.find():
...     print i
...
{u'lang': u'python', u'_id': ObjectId('554f0e3cf579bc0767db9edf'), u'author': u'qiwsir', u'title': u'from beginner to master'}
{u'lang': u'english', u'title': u'physics', u'_id': ObjectId('554f28f465db941152e6df8b'), u'author': u'Newton'}
{u'_id': ObjectId('554f2b4565db941152e6df8c'), u'name': u'Hertz'}
如果有多个文档,想一下子插入到集合中(在MySQL中,可以实现多条数据用一条命令插入到表里面),可以这么做:
>>> n1 = {"title":"java", "name":"Bush"}
>>> n2 = {"title":"fortran", "name":"John Warner Backus"}
>>> n3 = {"title":"lisp", "name":"John McCarthy"}
>>> n = [n1, n2, n3]
>>> n
[{'name': 'Bush', 'title': 'java'}, {'name': 'John Warner Backus', 'title': 'fortran'}, {'name': 'John McCarthy', 'title': 'lisp'}]
>>> books.insert(n)
[ObjectId('554f30be65db941152e6df8d'), ObjectId('554f30be65db941152e6df8e'), ObjectId('554f30be65db941152e6df8f')]
这样就完成了所谓的批量插入,查看一下文档条数:
>>> books.find().count()
6
提醒读者,批量插入的文档大小是有限制的,有人说不要超过20万条,有人说不要超过16MB,我没有测试过。在一般情况下,或许达不到上限,如果遇到极端情况,就请读者在使用时多注意了。
如果要查询,除了通过循环之外,能不能按照某个条件查呢?比如查找'name'='Bush'的文档:
>>> books.find_one({"name":"Bush"})
{u'_id': ObjectId('554f30be65db941152e6df8d'), u'name': u'Bush', u'title': u'java'}
对于查询结果,还可以进行排序:
>>> for i in books.find().sort("title", pymongo.ASCENDING):
...     print i        #Python 3: print(i)
...
{u'_id': ObjectId('554f2b4565db941152e6df8c'), u'name': u'Hertz'}
{u'_id': ObjectId('554f30be65db941152e6df8e'), u'name': u'John Warner Backus', u'title': u'fortran'}
{u'lang': u'python', u'_id': ObjectId('554f0e3cf579bc0767db9edf'), u'author': u'qiwsir', u'title': u'from beginner to master'}
{u'_id': ObjectId('554f30be65db941152e6df8d'), u'name': u'Bush', u'title': u'java'}
{u'_id': ObjectId('554f30be65db941152e6df8f'), u'name': u'John McCarthy', u'title': u'lisp'}
{u'lang': u'english', u'title': u'physics', u'_id': ObjectId('554f28f465db941152e6df8b'), u'author': u'Newton'}
这是按照"title"的值的升序排列的,注意sort()中的第二个参数,意思是升序排列。如果按照降序,就需要将参数修改为pymongo.DESCEDING,也可以指定多个排序键。
>>> for i in books.find().sort([("name",pymongo.ASCENDING),("name",pymongo.DESCENDING)]):
...     print i        #Python 3:  print(i)
...
{u'_id': ObjectId('554f30be65db941152e6df8e'), u'name': u'John Warner Backus', u'title': u'fortran'}
{u'_id': ObjectId('554f30be65db941152e6df8f'), u'name': u'John McCarthy', u'title': u'lisp'}
{u'_id': ObjectId('554f2b4565db941152e6df8c'), u'name': u'Hertz'}
{u'_id': ObjectId('554f30be65db941152e6df8d'), u'name': u'Bush', u'title': u'java'}
{u'lang': u'python', u'_id': ObjectId('554f0e3cf579bc0767db9edf'), u'author': u'qiwsir', u'title': u'from beginner to master'}
{u'lang': u'english', u'title': u'physics', u'_id': ObjectId('554f28f465db941152e6df8b'), u'author': u'Newton'}
如果读者看到这里,请务必注意,MongoDB中的每个文档,本质上都是“键/值”对的类字典结构。这种结构,一经Python读出来,就可以用字典中的各种方法来操作。与此类似的还有一个名为JSON的东西,但是,如果用Python读过来之后,无法直接用JSON中的json.dumps()方法操作文档。其中一种解决方法就是将文档中的'_id'“键/值”对删除(例如:del doc['_id']),然后使用json.dumps()即可。读者也可是使用json_util模块,因为它是“Tools for using Python’s json module with BSON documents”,请阅读http://api.mongodb.org/python/current/api/bson/json_util.html中的模块使用说明。
更新
对于已有数据,更新是数据库中常用的操作。比如,要更新name为Hertz那个文档:
>>> books.update({"name":"Hertz"}, {"$set": {"title":"new physics", "author":"Hertz"}})
{u'updatedExisting': True, u'connectionId': 4, u'ok': 1.0, u'err': None, u'n': 1}
>>> books.find_one({"author":"Hertz"})
{u'title': u'new physics', u'_id': ObjectId('554f2b4565db941152e6df8c'), u'name': u'Hertz', u'author': u'Hertz'}
在更新的时候,用了一个$set修改器,它可以用来指定键值,如果键不存在,就会创建。
关于修改器,不仅仅是这一个,还有别的呢。
| 修改器 | 描述 |
|---|---|
| $set | 用来指定一个键的值。如果不存在则创建它 |
| $unset | 完全删除某个键 |
| $inc | 增加已有键的值,不存在则创建(只能用于增加整数、长整数、双精度浮点数) |
| $push | 数组修改器只能操作值为数组,存在key在值末尾增加一个元素,不存在则创建一个数组 |
删除
删除可以用remove()方法,稍一演示,读者必会。
>>> books.remove({"name":"Bush"})
{u'connectionId': 4, u'ok': 1.0, u'err': None, u'n': 1}
>>> books.find_one({"name":"Bush"})
>>>
这是将那个文档全部删除。当然,也可以根据MongoDB的语法规则写个条件,按照条件删除。
索引
索引的目的是为了让查询速度更快,当然,在具体的项目开发中,是否建立索引要视情况而定是否建立索引。因为建立索引也是有代价的。
>>> books.create_index([("title", pymongo.DESCENDING),])
u'title_-1'
这里仅仅是对pymongo模块做了一个非常简单的介绍,在实际使用过程中,上面知识是很有限的,所以需要读者根据具体应用场景再结合MongoDB的有关知识去尝试新的语句。
总目录 | 上节:mysql数据库(2) | 下节:sqlite数据库
如果你认为有必要打赏我,请通过支付宝:qiwsir@126.com,不胜感激。